
Subaru Forester: Installing a child restraint system (CRS) / Securing a child restraint seat with “Tether Anchor” system

|
|
|
Before attaching the tether strap, first secure the Child Restraint System (CRS) using either the LATCH lower anchors or the vehicle seat belt. If the CRS manufacturer recommends using a top tether, connect it to the appropriate tether anchor and tighten it according to the manufacturer's instructions. Proper tether use helps improve the overall stability of the child seat in your Kia Telluride.
The tether anchor points are located on the rear seatbacks.
WARNING
Observe the following precautions whenever using a tether anchor:
-
Carefully read and follow every installation instruction supplied with your Child Restraint System.
-
Never attach more than one Child Restraint System to a single tether anchor. Excessive load may cause the anchor or attachment hardware to loosen or fail.
-
Attach the tether strap only to the designated tether anchor. Connecting it to any other part of the vehicle may prevent the system from functioning correctly during a collision.
-
Do not use tether anchors to secure adult seat belts, cargo, harnesses, or any accessories other than an approved Child Restraint System.
-
Whenever the rear seat belts are not being used to secure a CRS, buckle them behind the child seat. This helps reduce the risk of a child becoming entangled in the seat belt.
To install and secure the tether strap:
|
-
Route the tether strap over the seatback.
On vehicles equipped with adjustable headrests, guide the tether strap beneath the headrest and between the headrest posts. If the headrest is not adjustable, route the strap over the top of the seatback.
- Attach the tether hook to the designated tether anchor and tighten the strap according to the Child Restraint System manufacturer's instructions until the CRS is firmly secured.
- After installation, confirm that the Child Restraint System is securely attached by pushing and pulling it forward and side to side. Only minimal movement should be present.
 Securing a child restraint system (CRS) with the LATCH anchors system
To install a LATCH-compatible Child Restraint System in either rear ..
 Securing a CRS with a lap/shoulder belt
If the LATCH system is not being used, the Child Restraint System must be installed using the lap portion of the vehicle's lap/shoulder seat belt in accordance with both the CRS manufacturer's instructions and the Kia Telluride owner's manual...
Other information:
Subaru Forester 2019-2026 Owners Manual: Seat heater (if equipped)
The seat heater is equipped in the front seats or rear seats (window side seating position). The seat heater operates when the ignition switch is either in the “ACC” or “ON” position. Safety precautions CAUTION People with delicate skin may suffer slight burns even at low temperatures if they use the seat heater for a long period of time...
Subaru Forester 2019-2026 Owners Manual: Windshield washer fluid
Use windshield washer fluid. If windshield washer fluid is unavailable, use clean water. In areas where water freezes in winter, use an anti-freeze type windshield washer fluid. If you fill the reservoir tank with a fluid with a different concentration from the one used previously, purge the old fluid from the piping between the reservoir tank and washer nozzles by operating the washer for a certain period of time...
Categories
- Manuals Home
- Power steering warning light
- Vehicle load limit – how to determine
- Steering Responsive Headlight (SRH)
- New on site
- Most important about car
Type B multi-function display (color LCD)
Turn the ignition switch to “ON”.
 button.
Select “Settings”.
Select “Vehicle”.
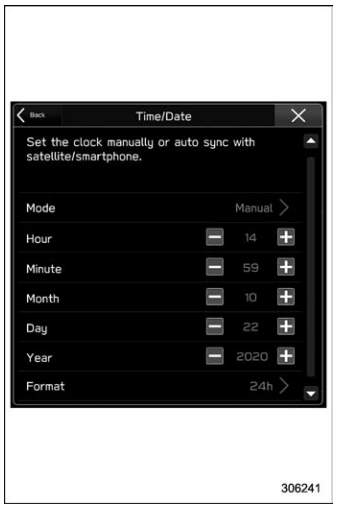
Select “Time/Date” and then select “Manual”.
button.
Select “Settings”.
Select “Vehicle”.
Select “Time/Date” and then select “Manual”.
 to complete the
clock
setting.
to complete the
clock
setting.
